Today Patricia has the last challenge for this month, and seeing as it’s the fourth week it’s a sketch.
For this week’s challenge I opted to use the Heartful Blooms stamp set and came up with two variations – the first one being more CAS than the other.
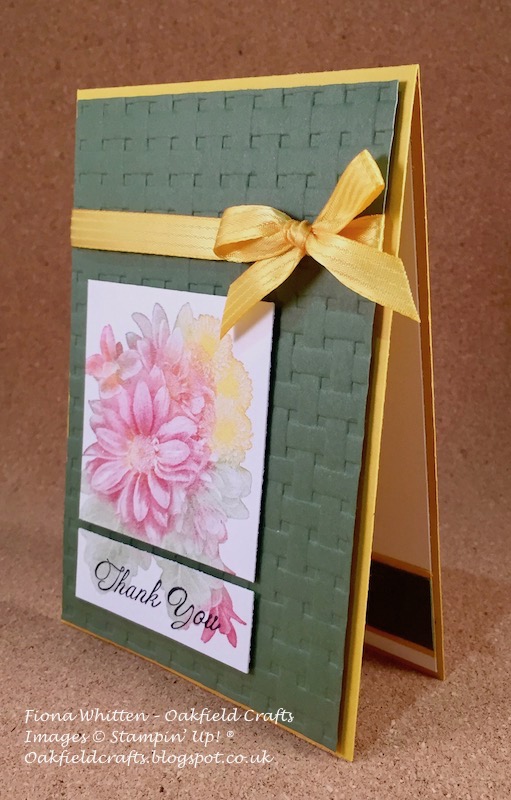
The first card started off as
A 10.5 x 29.7 cm piece of Rose Red, scored and folded at 14.9 cm
Layered with a 10.0 x 14.4 cm piece of Basic Black,
6.5 x 8.5 cm piece of Whisper White, and a
10.0 x 14.4 cm piece of Whisper White for the inside.
The piece of Basic Black cardstock was embossed using the new Basket Weave Textured Impressions Embossing Folder and then glued directly to the card front.
The flower image was stamped in Rose Red onto the whole of the small piece of Whisper White and then the sentiment was stamped in Black Archival Ink. Once the ink was dry, I then cut the Whisper White cardstock up by cutting off the bottom 2.0 cm (the end with the sentiment on). Both pieces were then added to the card front using Stampin’ Dimensionals.
I also stamped the inside of the card with the same image and ink as the front.
The second card is a little different because I used sponge daubers to ink up different parts of the stamp with different colours.
The cardstock sizes are the same as the first card except this time I used Crushed Curry and Always Artichoke.
For the card front I used Rose Red, Always Artichoke and Crushed Curry ink, and I finished off the card by wrapping some Crushed Curry Stitched Satin Ribbon around the embossed piece of Always Artichoke and tied it in a bow.
Don’t forget to take a moment to visit the CAS Colours & Sketches Blog to see what the other members of the design team have come up with. You will find the link to add your project there along with a link to the challenge rules.
Thought I’d share a couple of the other cards I made using the Epic Celebrations stamp set. You can check out the other one here.
The images for both cards in this post were stamped directly onto pieces of Crumb Cake cardstock using Black Archival Ink.
For the card above I also stamped the image onto a piece of Picture Perfect Party Designer Series Paper and then fussy cut it out. I then glued the paper onto the stamped image and used my Chalk Marker to colour the laces and also the rest of the Crumb Cake image.
I think that the card would be great for a teenager and I for one would love to have a pair of casual shoes that look like that (even though I’m well past the teenage years).
As mentioned above, the image for the card below was stamped onto the Crumb Bake cardstock using Archival Black ink. I added the detail at the bottom because I forgot that the ink took a little time to dry and I managed to get a small smudge on it. The dots do an excellent job of masking the smudge, and actually add that little extra bit of interest that the card needed, but without detracting from the main image.
Don’t forget, you can get the Epic Celebrations stamp set for FREE with a £45 order. The Sale-A-Bration offer is only on until 31 March so don’t miss out.
It’s not often I get to post a blog post twice in one day but the timing between here and Australia means you get two blog posts today!
I am for the first time taking part in Kylie Bertucci’s International Blog Hop, and hopefully you like my card enough to vote for it. The hop highlights projects from demonstrators all over the world so there is lots to see.
In case you are wondering where you are, my name is Fiona Whitten, and I live in the UK.
We have free choice to showcase our favourite item from the Sale-A-Bration or 2018 Spring/Summer Catalogues.
I’m sure I’m not alone when I say that my favourite is whatever is on my craft desk at that particular moment in time! Me fickle? Nooo…..
Anyway, the Epic Celebrations stamp set has been sitting on the side for a little while so I thought it about time that I inked it up. Once I started I couldn’t stop, it’s so much fun, and here is one of my projects. This card is going to be heading to Kent next week for my brother-in-laws birthday.
To make the card
I started with a 10.5 x 29.7 cm piece of Crumb Cake and folded it in half at 14.9 cm to create the card base.
The card front was then wiped with an embossing buddy and the first pair of headphones was stamped using Black Archival Ink.
Before the ink had a chance to dry I sprinkled clear Embossing Powder over it and carefully tapped off the excess before heating the image with my Heat Tool.
The second pair of headphones was then stamped and embossed in the same way as the first.
The headphones were then coloured using Stampin’ Blends. They work really well on Crumb Cake cardstock. I used Light Calypso Coral, Light Daffodil Delight, and the Light and Dark Smoky Slate pens. Please note, they don’t look like the colours above when you first apply them but they dry to these colours.
The sentiment was stamped onto a scrap piece of Crumb Cake using a Versamark ink pad and then sprinkled with Gold Embossing Powder. The powder was tapped off gently and then the image was heated up with a Heat Tool.
Lastly, the sentiment was cut out using one of the smaller square dies (3.6 x 3.6 cm) from the Layering Squares Framelits and added to the card front using Stampin’ Dimensionals.
You can vote for your favourite projects by clicking on the link below.
The top ten winners are invited to take part in a blog hop that will take place in March and I would love to take part. Just so you know, you will receive a number of votes so I hope that you like my project enough to give me one of them.
Happy stamping.
Fiona xx
My project supply list is as follows. If you live in the UK click on any of the pictures and it will take you to my online shop.
It's not often I get to post a blog post twice in one day but the timing between here and Australia means you get two blog posts today!
I am for the first time taking part in Kylie Bertucci's International Blog Hop, and hopefully you like my card enough to vote for it. The hop highlights projects from demonstrators all over the world so there is lots to see.
In case you are wondering where you are, my name is Fiona Whitten, and I live in the UK.
We have free choice to showcase our favourite item from the Sale-A-Bration or 2018 Spring/Summer Catalogues.
Wow the month is slipping by and today is the third Tuesday of the month. This means it’s time for a colour challenge and this is what Patricia has in store for us.
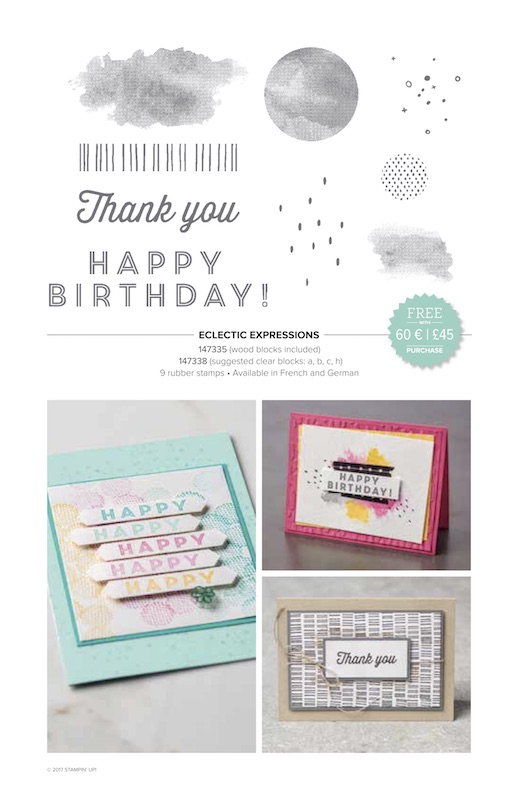
Admittedly this is not a colour combination that I would have thought of, but once I started playing with the inks and the Eclectic Expressions stamp set ( a new Sale-A-Bration stamp set) I had a few cards to choose from.
In fact, I had so many cards to share that I couldn’t make up my mind so I had my daughter, Jenny, choose the one she liked the most.
I had a little help making this card because I used my new Stamparatus (available 1 June unless you were able to reverse one for early release) to make sure that all the circles and then the “bar codes” lined up. Using the tool made it quick and simple because all I had to do was clean the stamp before inking the next colour, and then move the plate to it’s next position along the hinge.
Please feel free to leave a comment and let me know what you think. I’d love to hear from you. Also, don’t forget to pop over to the CAS Colours & Sketches Blog to see what the other members of the design team have been up to.
Wow the month is slipping by and today is the third Tuesday of the month. This means it's time for a colour challenge and this is what Patricia has in store for us.
Admittedly this is not a colour combination that I would have thought of, but once I started playing with the inks and the Eclectic Expressions stamp set ( a new Sale-A-Bration stamp set) I had a few cards to choose from.
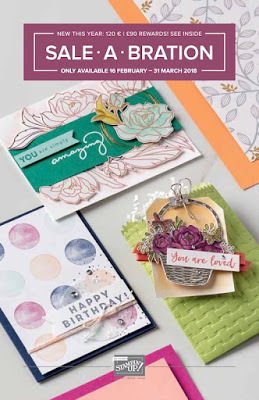
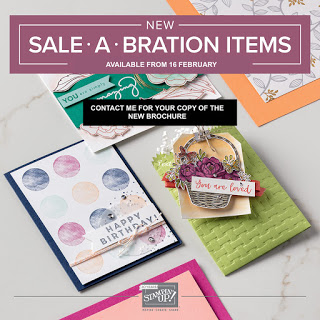
As mentioned in the 1st Release Catalogue there are new items being added today to give you even more fabulous Sale-A-Bration options.
Not sure what Sale-A-Bration is about? Well, it’s a way to receive select FREE Products. It runs until 31 March and for each £45 you spend you can choose a Level 1 item. Spend £90 and you can choose either a Level 2 item or 2 Level 1 items.
I’ve yet to play with the new Level 1 stamp set called Eclectic Expressions. I have lots of ideas whirling around at the moment, so I’m sure I’ll have something to share with you very soon.
Loving the foiled papers in this Level 1 Springtime Foils Specialty Designer Series Pack. There’s a mixture of Gold, Rose Gold and Silver foils on these 12″ x 12″ papers and for once I didn’t hesitate to cut them up.
The third and last new option is a Level 2 bundle made up of the Blossoming Basket Stamp Set and the Basket Weave Textured Impressions Embossing Folder. The embossed detail on the cardstock that I’ve run through my Big Shot with the Basket Weave Textured Impressions Embossing Folder is stunning. You can earn this Level 2 Bundle for free with a £90 but will be able to purchase the embossing folder come 1 June when the new 2018-2019 Annual Catalogue is released. Free is better though!
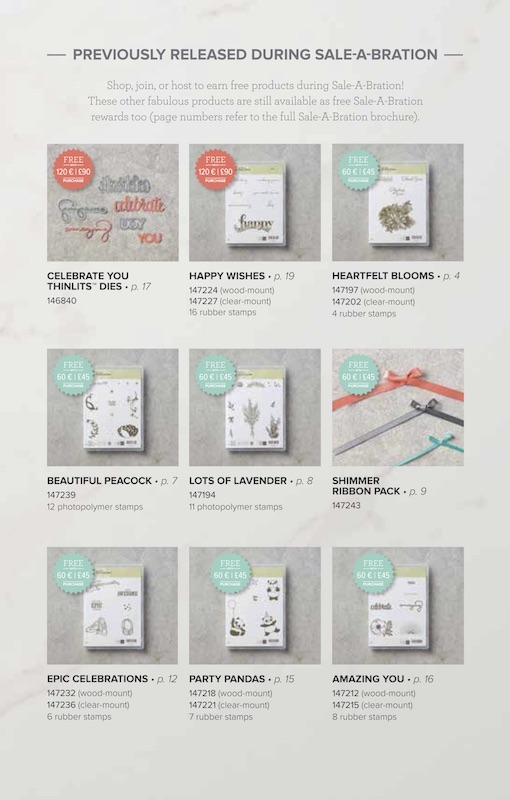
Of course, we mustn’t forget the items from the 1st release which are still available.
All items are available until 31 March on a while stocks last basis. So don’t delay, place your order here and don’t forget to –
Add your Sale-A-Bration item(s). Each £45 order entitles you to a Level 1 item. £90 gets you a Level 2 item or 2 lots of Level 1 items, etc.
Use this month’s code ( M6GZNYWW) to receive your free gift from me.
As mentioned in the 1st Release Catalogue there are new items being added today to give you even more fabulous Sale-A-Bration options.
Not sure what Sale-A-Bration is about? Well, it's a way to receive select FREE Products. It runs until 31 March and for each £45 you spend you can choose a Level 1 item. Spend £90 and you can choose either a Level 2 item or 2 Level 1 items.
There’s less than a week to go before booking closes for the April 2018 Retreat.
Natalie O’Shea and I have a fun and friendly papercraft weekend planned for 21st & 22nd April over at the Holiday Inn, Guildford. Sound interesting?
You have the option to stay the whole weekend (twin or single rooms available) or come along just for the Saturday.
We have 6 classes planned – 4 on Saturday and 2 on Sunday, which will be suitable for all levels of crafter.
You will receive
A fabulous kit filled with Stampin’ Up! products appropriate for whichever option (1 day or 2 day) you have decided to go for. If you don’t use it all the rest goes home with you.
A hot and cold buffet lunch on the days you are attending
Unlimited tea/coffee and snacks
Dinner on Saturday evening
Gifts and surprises.
Book your spot by paying the deposit of £50 per person by 21 February. The balance is payable by 16 March.
Full details including the costs and the deposit payment links (PayPal) and other options can be found by clicking on the picture above or here.
Any questions? Please email me at fiona@oakfieldcrafts.co.uk or phone me on 07707 695801.
There's less than a week to go before booking closes for the April 2018 Retreat.
Natalie O'Shea and I have a fun and friendly papercraft weekend planned for 21st & 22nd April over at the Holiday Inn, Guildford. Sound interesting?
You have the option to stay the whole weekend (twin or single rooms available) or come along just for the Saturday.
We have 6 classes planned - 4 on Saturday and 2 on Sunday, which will be suitable for all levels of crafter.
You will receive
A fabulous kit filled with Stampin' Up! products appropriate for whichever option (1 day or 2 day) you have decided to go for. If you don't use it all the rest goes home with you.
A hot and cold buffet lunch on the days you are attending
Unlimited tea/coffee and snacks
Dinner on Saturday evening
Gifts and surprises.
Book your spot by paying the deposit of £50 per person by 21 February. The balance is payable by 16 March.
Full details including the costs and the deposit payment links (PayPal) and other options can be found by clicking on the picture above or here.
Any questions? Please email me at fiona@oakfieldcrafts.co.uk or phone me on 07707 695801.
Welcome to the third Tuesday of February, and this week Patricia has a sketch for us.
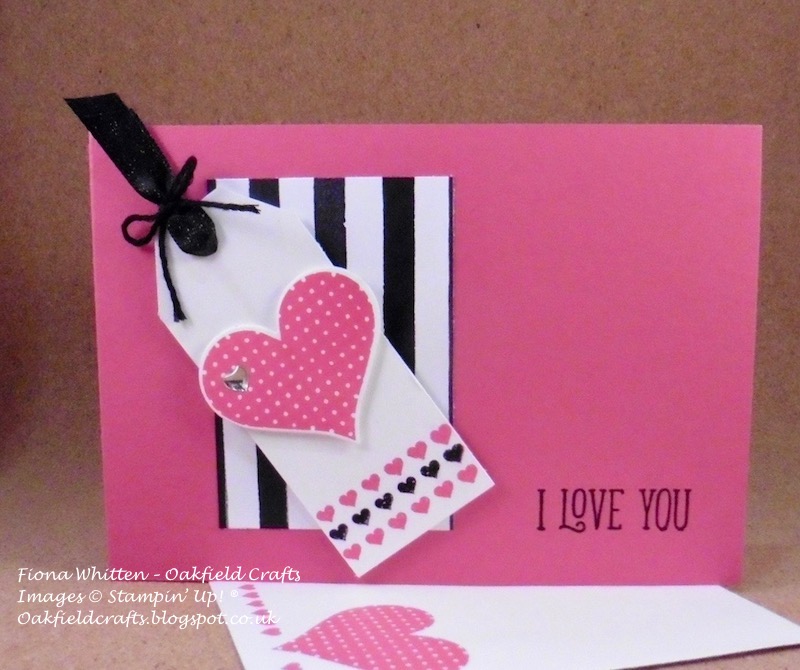
It’s only a few days until Valentine’s Day (in fact it’s tomorrow) and I’m guessing that most of you have already made your valentine’s card. For those of you who are a bit last minute dot com it’s not too late and I used the sketch as inspiration for one.
I started with a Melon Mambo base card and added a piece of the striped paper from the Petal Passion Designer Series Paper.
I made the tag from a piece of Whisper White cardstock and stamped the little hearts in both Melon Mambo and Basic Black. The hearts come from the Heart Happiness stamp set just like the larger heart that I stamped in Melon Mambo.
The heart was finished off by the addition of a silver heart from the Metallic Enamel Shapes. The tag was finished off with some Basic Black Shimmer Ribbon which was tied in place with some Basic Black Baker’s Twine.
The sentiment which was stamped in Basic Black comes from the Happy Birthday Gorgeous stamp set. Not one you would think to use for Valentines but it had the sentiment that I wanted to use.
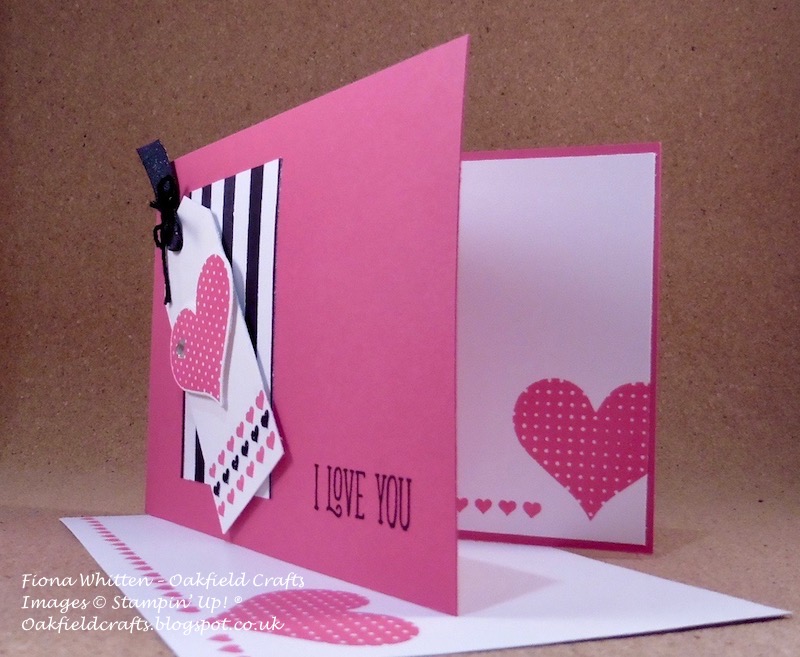
Here’s a quick look at the inside. I’ve no idea why the card looks bent but honestly it’s not!
Don’t forget to check out the projects from the other members of the design team. You can find them HERE. You’ll also find the link there to add your project if you want to take part in the challenge.
Happy stamping.
Fiona xx
My supply list is below. Shop Online and make the most of the current Sale-A-Bration offer by clicking on any of the pictures below. Spend £45 and you get to choose a Level 1 item for free, spend £90 and you can choose 2 lots of Level 1 items or a Level 2 item for free.
Welcome to the third Tuesday of February, and this week Patricia has a sketch for us.
It's only a few days until Valentine's Day (in fact it's tomorrow) and I'm guessing that most of you have already made your valentine's card. For those of you who are a bit last minute dot com it's not too late and I used the sketch as inspiration for one.
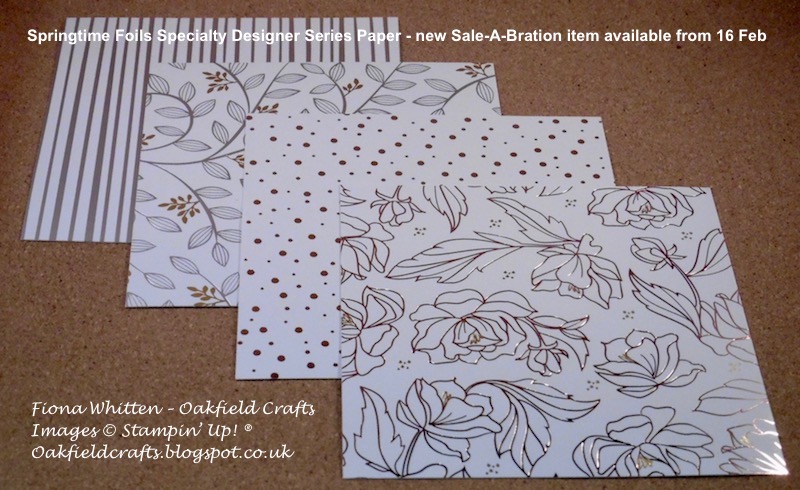
The Springtime Foils Specialty Designer Series Paper is another of the new Sale-A-Bration options available from 16 February. Spend £45 and you can choose it as your Free Sale-A-Bration item.
The pack of 12″ x 12″ paper has 12 sheets in it – 3 each of 4 different designs.
There are two floral designs and two geometric (one with lines and the other with dots). You can use the paper as it comes, or colour it as desired.
Here are a couple of ideas for you.
The Designer Series Paper on this first card was left alone and I paired it with images and dies from the Petal Passion Suite. Who says you can’t have blue roses? I used my Daffodil Delight, Old Olive and Night of Navy Stampin’ Blends to colour the flowers and leaves and also used the colour lifter to add a little depth.
For this second card I used my Sponge Brayer and coloured the paper using my Basic Grey Archival Ink. I love the elegant look that the grey gives to the silver and gold foil. I finished the card off with some Basic Grey Satin Stitched Ribbon and a sentiment that I cut out using the Layering Oval Dies.
A very simple card to make but it has a real WOW factor when the light hits the foil.
Don’t forget, these papers and the other two new items (one of which I’ve not shared with you yet) are only available from 16 February. But, there are lots more to choose from the first release. A £45 spend gets you a free Level 1 item and a £90 spend gets you either two Level 1 items or a Level 2 item.
If you live in the UK you can shop with me by clicking on the SHOP NOW button at the top of the page. And, don’t forget to add this Month’s Code (M6GZNYWW) before you check out. Not sure how to do that, here’s a quick crib for you.
The Springtime Foils Specialty Designer Series Paper is another of the new Sale-A-Bration options available from 16 February. Spend £45 and you can choose it as your Free Sale-A-Bration item.
The pack of 12" x 12" paper has 12 sheets in it - 3 each of 4 different designs.
There are two floral designs and two geometric (one with lines and the other with dots). You can use the paper as it comes, or colour it as desired.
Did you notice in the front of the Sale-A-Bration catalogue that it mentions that will be more items available from 16 February?
If you haven’t been tempted by any of the current offerings then perhaps these new ones might just tip the balance for you. I mean, who doesn’t love free product?
There are 3 additional choices being made available on 16 February. A couple of them are Level 1 items which means you can get either of them free with a £45 spend and there is also a Level 2 item which will be free with a £90 spend.
As a demonstrator I’ve been able to get ahold of each of them and I have a project to share with you today.
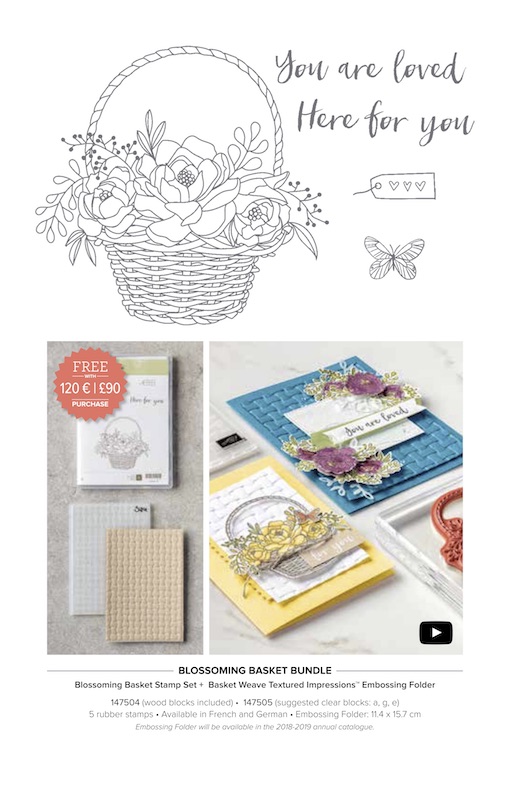
The Blossoming Basket Bundle consists of the Blossoming Basket Stamp Set (available in Wood & Clear Mount) and the Basket Weave Dynamic Textured Impressions Embossing Folder*. Having two items in the bundle means that this will a Level 2 item. Like all the other Sale-A-Bration items, things will only be available until 31 March (or while stocks last as we get closer to 31 March).
I stamped the large basket image in Tuxedo Black Memento Ink and then coloured in the basket and flowers using my Stampin’ Blends. The whole thing was then fussy cut out and mounted it onto a circle of Old Olive using Stampin’ Dimensionals. The little tag was stamped and cut out by hand too but it’s glued directly onto the basket.
I embossed a piece of Cherry Cobbler cardstock with the embossing folder, and this was then mounted onto a Soft Suede base card using Stampin’ Dimensionals.
The card was finished off with a Delicate White Doily, some Rhinestone Basic Jewels and also a piece of White Baker’s Twine that I doubled over and tied in a bow.
The new brochure will be available Online on 16 February but if you don’t already have a UK demonstrator please get in touch with your details and I’ll pop a copy in the post to you.
Happy stamping.
Fiona xx
*The Basket Weave Dynamic Textured Impressions Embossing Folder will be available in the 2018-19 Annual Catalogue.
My supply list is below, but don’t forget
to use this month’s code (M6GZNYWW) before you check out to receive your free gift from me, and
you can’t opt for the new Sale-A-Bration bundle until 16 Feb but there are lots of fabulous alternatives if you are planning to order before then.
I hold a Card & A Cuppa event twice a month at a cafe in the local craft village (1st and 3rd Wednesday’s of the month) and this month I wanted to come up with something a little different for Valentines day.
I’m a bit of a non-traditional girl when it comes to Valentine cards and I knew that the people who attend the Card & A Cuppa events like to do something a little different on occasions.
The Heart Happiness stamp set is a great set to use for valentines, anniversaries, weddings etc. There are your more traditional hearts, flowery hearts and one that is slightly different because it has stripes.
This is what I designed using the striped heart.
I stamped the heart twice in Early Espresso onto some paper from the Wood Textures Designer Series Paper Stack and then a third heart in the same colour onto some Crumb Cake cardstock. All three hearts were then cut out using the die from the co-ordinating Lots to Love Box Framelits.
The heart embellishment comes from the Hearts & Stars Elements and I simply coloured it by pressing it into an Early Espresso ink pad.
I used a sentiment from the Teeny Tiny Sentiments stamp set. You have to love this set because it’s a great all round one for sentiments (there are 24 of them) and most of the them will fit into the Classic Label Punch.
I purposely took the Teeny Tiny Sentiments stamp set with me because I knew that there would be people not wanting a valentines card.
Here’s another card that I took to show.
The hearts are the same as those in the first card. The differences being –
The card is landscape instead of portrait.
There is an added Very Vanilla layer under the Crumb Cake layer.
The heart embellishment is the interior element from the heart in the first picture.
The sentiment has a piece of Early Espresso punched out, cut in half and glued underneath the crumb cake.
I used a different sentiment from the same Teeny Tiny Sentiment stamp set.
Fancy coming along to the next one? I’ll be at the Grange Chocolate Cafe (RG40 3AW) on Wednesday 21 February from 10.00 am to 11.45 am. It’s a very friendly group, but if you fancy bringing a friend with you that’s great. The cost is £5.00 per person and for that you receive all your supplies to make a card and also a hot drink of your choice.
Happy Stamping.
Fiona xx
My supply list is below. Shop Online and make the most of the current Sale-A-Bration offer by clicking on any of the pictures below. Don’t forget that for each £45 you spend you get to choose a Level 1 item from the Sale-A-Bration Catalogue. Spend £90 and you can choose a Level 2 item or 2 lots of Level 1 items.
I hold a Card & A Cuppa event twice a month at a cafe in the local craft village (1st and 3rd Wednesday's of the month) and this month I wanted to come up with something a little different for Valentines day.
I'm a bit of a non-traditional girl when it comes to Valentine cards and I knew that the people who attend the Card & A Cuppa events like to do something a little different on occasions.
The Heart Happiness stamp set is a great set to use for valentines, anniversaries, weddings etc. There are your more traditional hearts, flowery hearts and one that is slightly different because it has stripes.
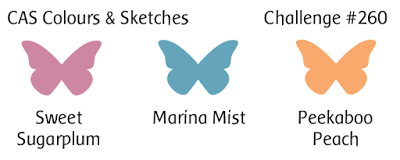
Hi and welcome to the first of February’s challenges. This month Patricia is hosting, and this being the first Tuesday in the month it’s time for a colour challenge.
My first thought when I saw the colours was to run off and find a cute flowery image but I then stopped and actually thought about it, changed my mind a few times and then came up with this.
There’s not a dimensional in sight on this card. Everything is glued flat because I wanted to keep it clean and simple.
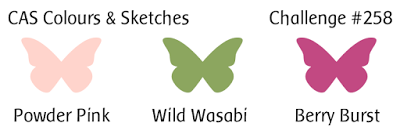
I started with a piece of Whisper White and stamped a sentiment from the Picture Perfect Birthday stamp set in Berry Burst onto a piece of Whisper White cardstock. The first part of the party blower was then stamped in Wild Wasabi straight onto the Whisper White cardstock too. The other parts of the blower were stamped in Powder Pink and Berry Burst onto a scrap piece of Whisper White (two stamps making the one image) and I fussy cut it out before gluing it to the Whisper White piece. The piece of Whisper White was then glued to a larger piece of Berry Burst and then onto the card front.
I hadn’t originally intended to add the sprinkles in the corner but felt that it needed a little something so I used all three colours for the “dots and dashes” and then added some Clear Wink of Stella to them. You can’t tell from the photo but they do sparkle a little.
Of course, the inside of the card is decorated too – just with the sprinkles.
Don’t forget to check out the projects being shared by other members of the design team. You can do so by clicking here.
Hi and welcome to the first of February's challenges. This month Patricia is hosting, and this being the first Tuesday in the month it's time for a colour challenge.
My first thought when I saw the colours was to run off and find a cute flowery image but I then stopped and actually thought about it, changed my mind a few times and then came up with this.
Hello and welcome to this month’s blog hop. We are missing Ann and her fabulous projects this month, but never fear, the rest of us have some amazing projects to share with you.
This month we are going with the theme of Love/Weddings or Reds/Pinks.
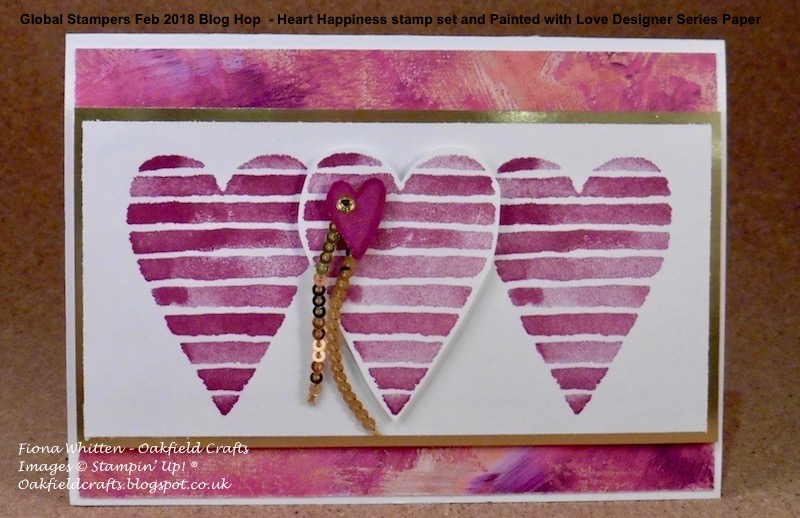
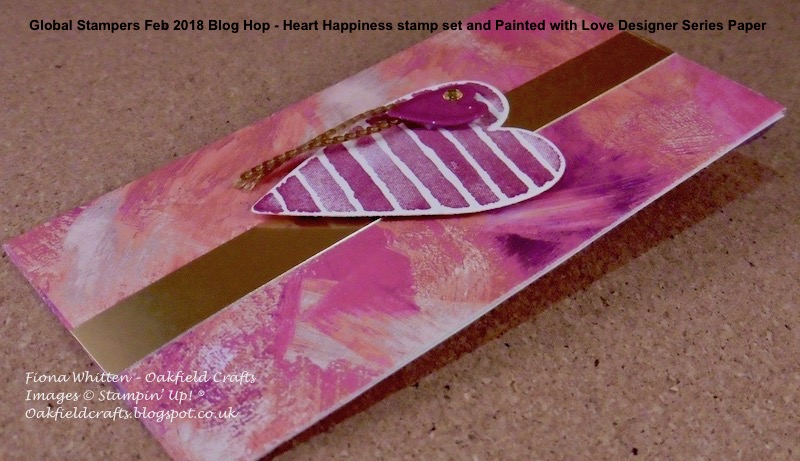
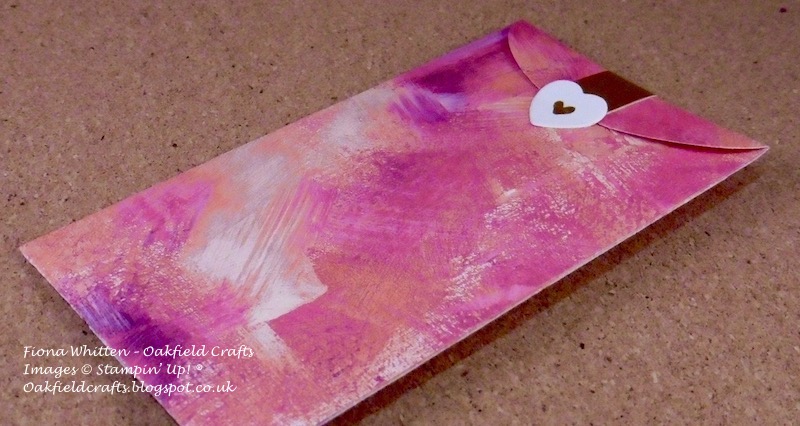
With Valentines Day only 10 days away I thought I’d share a couple projects made using the Heart Happiness stamp set, Painted With Love Designer Series Paper and also the Lots to Love Box Framelit Dies. I made both a card and a gift pouch to share with you.
Have you actually seen the Painted With Love Designer Series Paper (DSP) yet? It’s one of Stampin’ Up!s specialty papers. One side has gold foiled accents and the other (which is what I’ve used for these projects) has brushstroke imagery. It’s very lush and I very nearly didn’t cut it up. The colours are great for any love theme but I can see me using them for all sorts of things.
You can see the paper in more detail along with all the other new designer series paper from the 2018 Spring/Summer Catalogue in this Stampin’ Up! video.
The card is made out of Thick Whisper White cardstock and I matted a piece of the DSP on top.
I stamped the heart three times in Berry Burst. Twice direct to a piece of Whisper White (which was then matted to a slightly larger piece of Gold Foil Paper) and the third one onto some scrap Whisper White. I then cut out the third heart using a die from the Lots of Love Box Framelits. I also stamped a small heart in Berry Burst onto a scrap of Berry Burst cardstock and die cut it out too.
I accented the little heart with some Clear Wink of Stella, Gold Mini Sequins and a gold dot from the Metallic Enamel Shapes before adding it to the larger die cut heart using Stampin’ Dimensionals. The heart was then adhered to the card front using some more Stampin’ Dimensionals.
The pouch was die cut using the large die from the Lots of Love Box Framelits Dies and I cut it out twice from the same DSP used for the card. On one of the cutouts I then cut off both sides (they are normally used to make the sides of a box). From there, it was a simple case of adhering both pieces together and using one of the flaps to create the bottom of the pouch.
The other flap is used to make the closure. I used another die from the Lots to Love Framelits and cut out a heart from one of the small foil hearts which are on the reverse side of the DSP that I used.
The heart on the front was made in the same way as the heart on the front of the card. Before I added it to the front of the pouch I adhered a strip of Gold Foil down the front and over the back but just on the flap.
I hope you like my projects and please feel free to leave a comment before you hop onto the others.
If you would like to hop back to Alicia please click on the picture below
Alternatively, to hop forward to Robbie’s blog post please click on the picture below.
A full list of those taking part is here and you can click on any of their names to jump straight to their post.