Global Stampers Blog Hop - April 2018
Happy Easter to you all (and yes I know it's April Fools day too).
The theme for this month's hop is Easter and if you read my blog post from Friday you will know that I don't actually own any Easter stamps. Shock, horror!! That hasn't stopped me and I have a couple of cards to share today which are not only great Easter cards but by simply changing the sentiment will make great cards for other occasions.
Global Stampers Blog Hop - April 2018
Hello and welcome to our April blog hop.
Happy Easter to you all (and yes I know it’s April Fools day too).
The theme for this month’s hop is Easter and if you read my blog post from Friday you will know that I don’t actually own any Easter stamps. Shock, horror!! That hasn’t stopped me and I have a couple of cards to share today which are not only great Easter cards but by simply changing the sentiment will make great cards for other occasions.
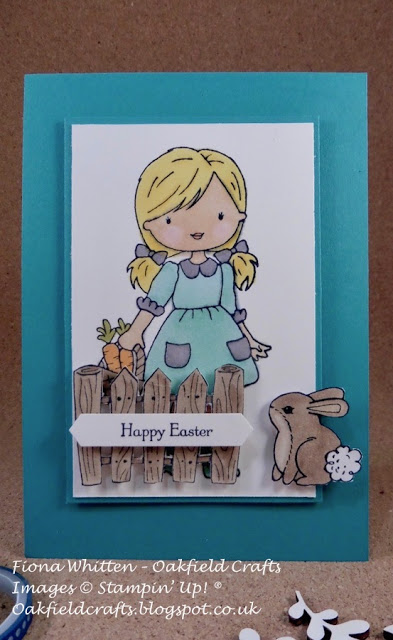
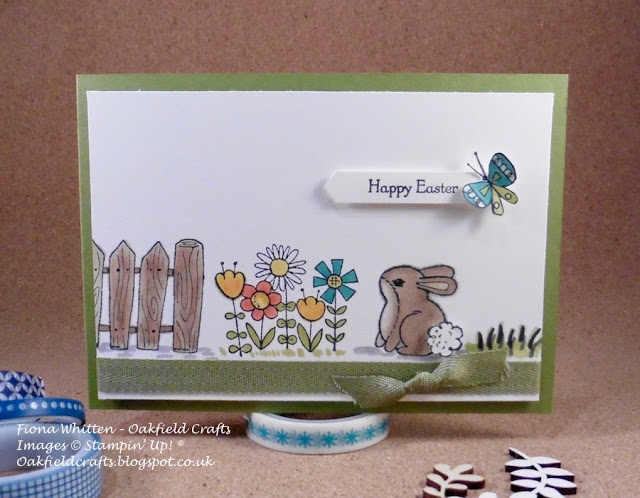
I’ve decided to use the Garden Girl and Teeny Tiny Sentiments stamp sets for my cards.
The Teeny Tiny Sentiments is a great set because there are 24 sentiments to choose from so there is sure to be one that meets your requirements. And, I just love the images in the Garden Girl stamp set – ideal for colouring. Please note that I used Stampin’ Blends to colour my cards. Sadly these are currently not available because they have been too popular and there are shipping delays for the restocking. It’s expected that they will be available again in May so watch this blog (or sign up for my newsletter) for the latest news.
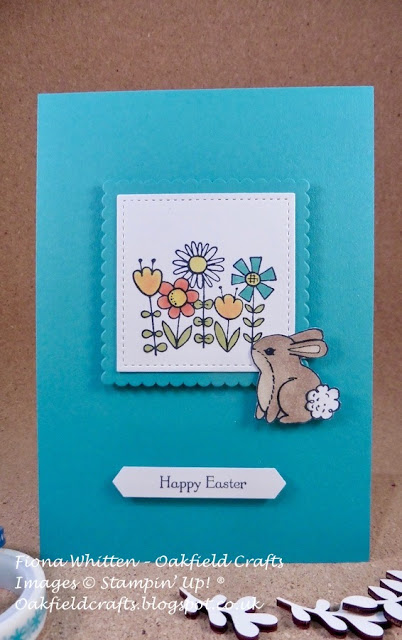
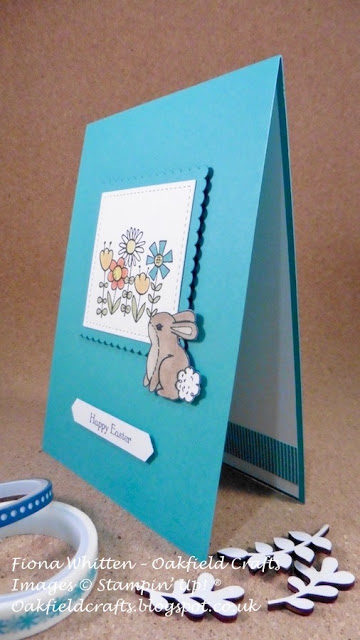
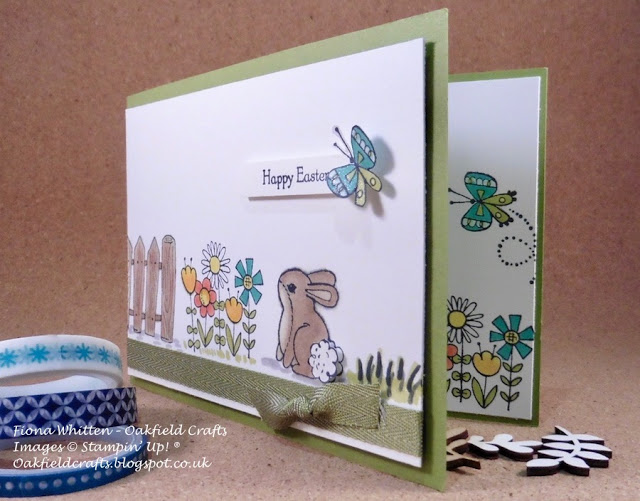
I just love this bunny. I think he could be tempted to eat those flowers! The inside of the card is decorated very simply with a strip of designer series paper. This was a scrap that I had left from other cards.
And you can hop forward to Robbie’s by clicking on the picture below.
Happy hopping and if you get lost the full list of everyone taking part is below.
Alicia – New Zealand
Ann – Australia
Fiona – UK (you are here)
Robbie – USA
Happy stamping.
Fiona xx
Easter Bunny Card using the Garden Girl stamp set
The one big problem that I have is that I don't actually have any Easter themed stamp sets. And then a thought struck my mind. I have a few stamp sets with cute bunnies on and what's more, the Teeny Tiny Sentiments stamp set has a Happy Easter stamp in it - problem solved.
Easter Bunny Card using the Garden Girl stamp set
I decided earlier this week that I would enter a card into the latest Global Design Project Challenge and very nearly had second thoughts because the theme is Easter.
The one big problem that I have is that I don’t actually have any Easter themed stamp sets. And then a thought struck my mind. I have a few stamp sets with cute bunnies on and what’s more, the Teeny Tiny Sentiments stamp set has a Happy Easter stamp in it – problem solved.
I had great fun making the card, not least because I got to play around with the images until I achieved a design that I liked. I can just imagine the bunny’s nose twitching at the sight and smell of those flowers.
Here’s a quick peek inside the card.
Have you seen...
Sneak Peek Project - Easter Bunny
Everyone coming will receive the Friends & Flowers clear mount stamp set plus lots of other goodies. The projects I have planned are a mixture of 3D items and cards (not all Easter). Full written instructions are also provided so people can complete things at home and, there will be more than enough supplies to make more than one of each project or even make their own designs.
I've still to make a gift for everyone and I'll share a photo of that next weekend once the class is over.
Tomorrow I'll be working on my challenge card. I'm still trying to figure out what to do and which challenge to enter but I know I need to get my act in gear otherwise I'll miss deadlines.
If you are interested in knowing what products I used for the card, details are as follows:
Fiona x
Easter Treats - Part 2
With George away and the kids old enough to look after themselves, I decided to spend the day in my craft room (except for a brief trip out for a spot of food shopping).
I managed to finish off my projects for Easter and then started on a totally unrelated one (samples for my next class).
Here are the Easter projects that I finished off. I am going to sneak one of them into my daughter's suitcase. She is off to South Africa later today to spend three weeks working at the Shamwari Game Reserve. The weight for her suitcase is limited to 23kg, which in theory should be sufficient but being a girl and wanting to take all the small electricals with her will mean that it is going to be a close run thing! Therefore, the smaller and lighter the Easter gift the better.
 |
| Here's a close up of one of them |
 |
 |
| A close up |
Stamp sets : Everybunny and Teeny Tiny Sentiments
Card Stock : Gumball Green, Daffodil Delight, Marina Mist and Whisper White
Designer Series Paper : Sunshine & Sprinkles
Ink : Daffodil Yellow, Pumpkin Pie, Marina Mist, Pretty in Pink, Wild Wasabi, Gumball Green
Accessories : Blender Pens, 2.5 cm x 20.0 cm Cellophane Bags, Watercolor Paper, Oval Scallop punch, 2-3/8" Scallop Circle punch, 2-1/2" Circle punch, 1-3/4" Circle punch, Delicate Doilies Sizzlets, Bitty Banners Framelits, Dimensionals
Oops, I just realised that if I had finished this a little earlier that I could have taken part in the SU-Only Challenge. Oh well. Hopefully I can take part in the next one.
Easter Treats
One of the local supermarkets has some cute chocolate bunnies for sale. They come in their own individual clear box and I thought that this would be a good starting point for the Easter gifts. The box that it comes in also has it's own background scenery.
Stampin' Up! supplies used:
Card stock: Wild Wasabi, Bashful Blue and Pretty in Pink
Accessories : Melon Mambo Striped Organdy ribbon, Scallop Edge Border Punch, Large Oval Punch, Simply Scored Scoring Tool
Once I'd made the above using colours from the Subtles Collection I thought I'd be a bit bolder and make a different one but this time using colours from the 2012-2014 In Color Collection. I also decided to make use of some of my old plastic boxes that the brads and buttons come in. I used both the top and bottom to hold a piece of acetate that I'd cut to size to make the circular box.
Stampin' Up! supplies used:
Stamp set : Easy Events
Card stock : Gumball Green, Midnight Muse and Whisper White
Ink : Midnight Muse, Raspberry Ripple and Summer Starfruit
Accessories : Gumball Green Stitched Satin Ribbon, Scallop Edge Border Punch
I'll be posting photos of more Easter projects tomorrow so check back to see what else I've been up to.


