Pages

Showing posts with label Trim the Tree DSP Stack. Show all posts

Little Boxes (or not so little ones)

Last night I hosted a team get together. I don't need any excuse to organise a get together and we hadn't had an informal evening for sometime.

The evening was a great chance to chat about all things Stampin' Up! (and non Stampin' Up! too) and enjoy my piece-de-resistance, some cream cheese covered in a raspberry chipolte sauce. Esther's husband was a little upset that we got to enjoy the dip, so that she took the leftover's home for him!!

Although it was an informal evening, I did organise a Make and Take for everyone to do.


The box is not as small as it looks - it actually measures 4" x 4" x 4" and is made out of a piece of 12" x 12" card stock. We used the Gift Box Punch Board to make the boxes, and this made it quick and easy, so more time for chatting and catching up - not that there was no chatter while the boxes were being made. There are instructions on the board together with dimensions for various sized boxes. This means that there is no need to guess the size of card stock needed or the measurements for the scoring and punching.

The Stampin' Up! products used to make this box were:


I've also made a stack of boxes using some of the smaller dimensions on the board. This makes a great little table decoration. I alternated the coloured boxes - Cherry Cobbler top and bottom and Garden Green in the middle.

There is a pretty bow on top - I just couldn't get the angle right for the photo

The whole stack is about 8" high with the bow

These three boxes measure - 3.25" x 3.25" x 3.25" (10" x 10" card stock), 2.5" x 2.5" x 2.5" (8" x 8" card stock) and 1.75" x 1.75" x 1.75" (6" x 6" card stock).

The additional Stamping' Up! products used to make these boxes are:


The Noel greeting on the bottom box is made by cutting out 5 Whisper White greetings and then gluing and stacking them with a gold glimmer greeting on top. The layers provide the necessary rigidity for the greeting to be glued to the box and the fact that it overhangs the edges does not matter.

It's November!!!

My last few posts have been very non-Christmas (although you could make a Christmas version of the box) so today I thought I'd share some of the stars from the Many Merry Stars Simply Created Kit. This kit features in the Autumn/Winter Supplement and is on a while supplies last basis.

I have one of the kits and so far have made a few of the stars but I'm planning on playing around with a few more to see about making them into boxes that can be opened and closed.

The three smallest stars now hanging on the tree in my craft room

2nd smallest - I love the wooden embellishments

The smallest box

This is the largest box and you get one of these

To give it some perspective this is it hanging on the wall in my craft room
The simply created kit contains everything you need to make the star boxes, as the tabs on the side pieces come with double sided tape on them.


It also comes with all the embellishments needed - baker's twine, stars, wooden elements and greetings. It does not however come with ribbon, and I've used some Cherry Cobbler Sheer Linen Ribbon to hang my boxes.

Have you noticed the little square boxes also hanging on the tree? The lovely Carol helped me make these using the Gift Box Punch Board and pieces of 6"x6" of card stock.  There are some little treats hiding inside the boxes. The boxes were pretty quick and easy to put together and are finished off with some Designer Series Paper from the Trim the Tree Designer Series Paper Stack and greetings from the That's the Ticket stamp set.

I'm currently putting together my last classes of the year and I have a sneaking suspicion that a star and a box might just be part of them.

I've been playing

The last couple of days have been spent designing cards for the Christmas Stamp-a-Stack event that I am holding on 4 October but I've also been playing with the Wondrous Wreath stamp set and matching framelits.

At last Saturday's All Day Event, one of the things that everyone got to make was a box to hold all the cards that they made. I decided to adapt the box and make it as a holder for some Christmas cards that I have made.


I saw the original idea for this box on Pinterest and managed to trace it back to Teneale Williams. I thought I would adapt it so that it took UK sized cards and put my own slant on it by using the Hardwood stamp and also the Wondrous Wreath stamp set.

I went a bit mad with stamping and die cutting the wreaths so I had a quite a few left that I turned into card fronts. I made two of each, the first using Whisper White card stock that was embossed using the Perfect Polka Dot embossing folder and the second pair using the Trim the Tree Designer Series Paper Stack.


The Stampin' Up! products used to make the card box are:


Did you know that 4 October is World Card Making Day? I know what I'll be doing that day, hopefully you will have some time to craft too.

A couple of quick things to quickly mention today. Firstly, the new Weekly Deals are now up and secondly the Clearance Rack has also been updated. Go check out those bargains by clicking on the link to my Online shop in the left hand margin.

Wonderous Wreath - Card and Box

It's been a busy week so far, how about you?

After a bit of a break, my monthly classes start again on Friday evening. We will be using some of the goodies from the new(ish) Annual Catalogue. I'm still working on a couple of projects for the weekend and I don't want to spoil the surprise for those coming so I will share them with you another time.

I've also been playing with some of my new goodies from the Autumn/Winter Catalogue in preparation for Saturday's Blog Hop.  Obviously I'm going to save that project for Saturday but here's another that I have been working on.


I've also taken time to set up the photo cube/booth in my craft room on my son's desk. He's now in college in Chicago so I have use of the desk for the time being.  I suspect that I am going to have to move the lights about a bit more because there are more shadows than I wanted.

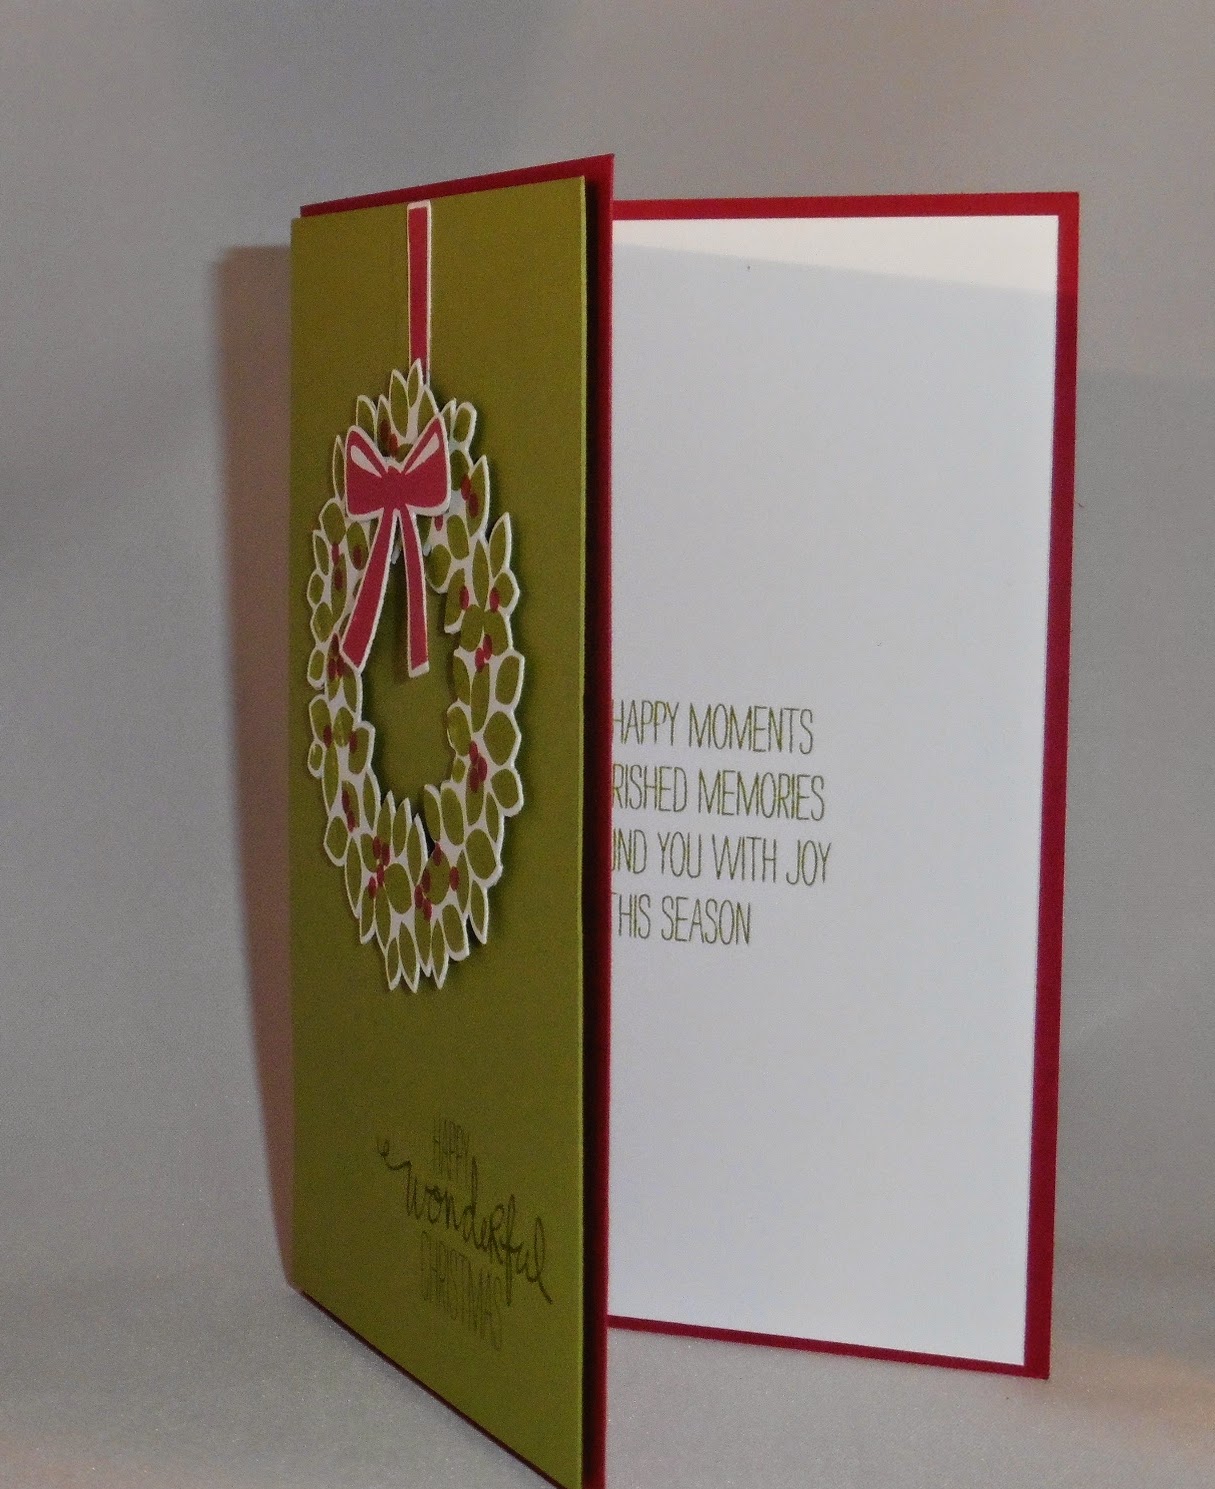
These projects were made using the Wonderous Wreath Bundle (Photopolymer stamp set and matching framelits)


A side view so that you can also see the greeting stamped on the inside of the card. The wreath is adhered to the card front with Dimensionals to give it some extra depth.


The box is one of the Tag a Bag Gift Boxes and I've decorated it with a cut down Polka Dot Tag a Bag Gift Bag and some paper from the Trim the Tree Designer Series Paper Stack. If you are wondering how I manged to cut the hole in the gift bag, I simply adhered the wreath first and then cut away the middle.

I love this Bundle and can think of tons of projects that I want to make. I just need the time to be able to do so.

Here's the details of the items used for the two projects:


I sent out an email last night to everyone who have said that they are interested in attending classes.  The email details the classes for the rest of the year and by popular demand I have changed the two regular monthly classes in October to mini Christmas Stamp-a-Stacks. If you are interested in coming along please let me know as space will be limited to 12 people.